Product
Switch from Mailchimp to Mailjet: A Step-by-Step Migration Guide
Thinking about leaving Mailchimp?
Learn how to easily migrate your contacts, email templates, and essential data to Mailjet with this step-by-step guide.

Choosing an email platform is about more than comparing features. As your business grows, you need a solution that can support your teams, scale with your sending needs, and meet your requirements for performance, collaboration, and compliance.
In this guide, you’ll learn why companies migrate from Mailchimp to Sinch Mailjet, and how to migrate your contacts, email templates, and essential data from Mailchimp to Mailjet in just a few simple steps. All you need is:
- Your Mailchimp account
- A new Sinch Mailjet account. Getting started is free and only takes a few minutes
Why businesses switch from Mailchimp to Mailjet
- Unlimited contacts to support your growth
- Predictable pricing based on email volume, not the size of your contact database
- Collaborative features designed for marketing teams and distributed organizations
- Advanced automation and intelligent segmentation to create more relevant customer journeys
- AI-powered capabilities that help you save time and optimize your campaigns
- Recognized deliverability expertise and reliable infrastructure you can count on
- A trusted platform built with security, privacy, and GDPR compliance in mind
Step 1: Migrate your Contacts from Mailchimp to Sinch Mailjet
1. Log in to your Mailchimp account.
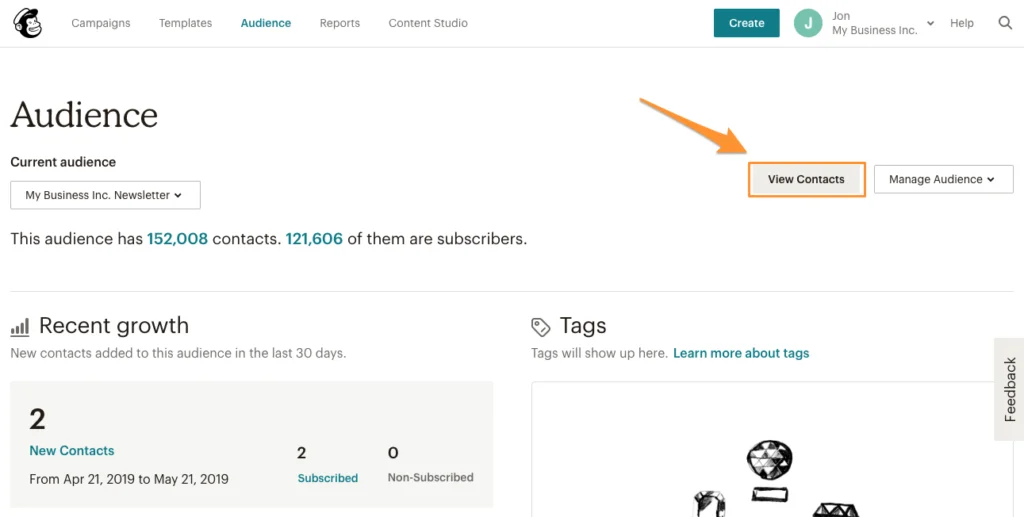
2. From the menu, click Audience, then select View Contacts.
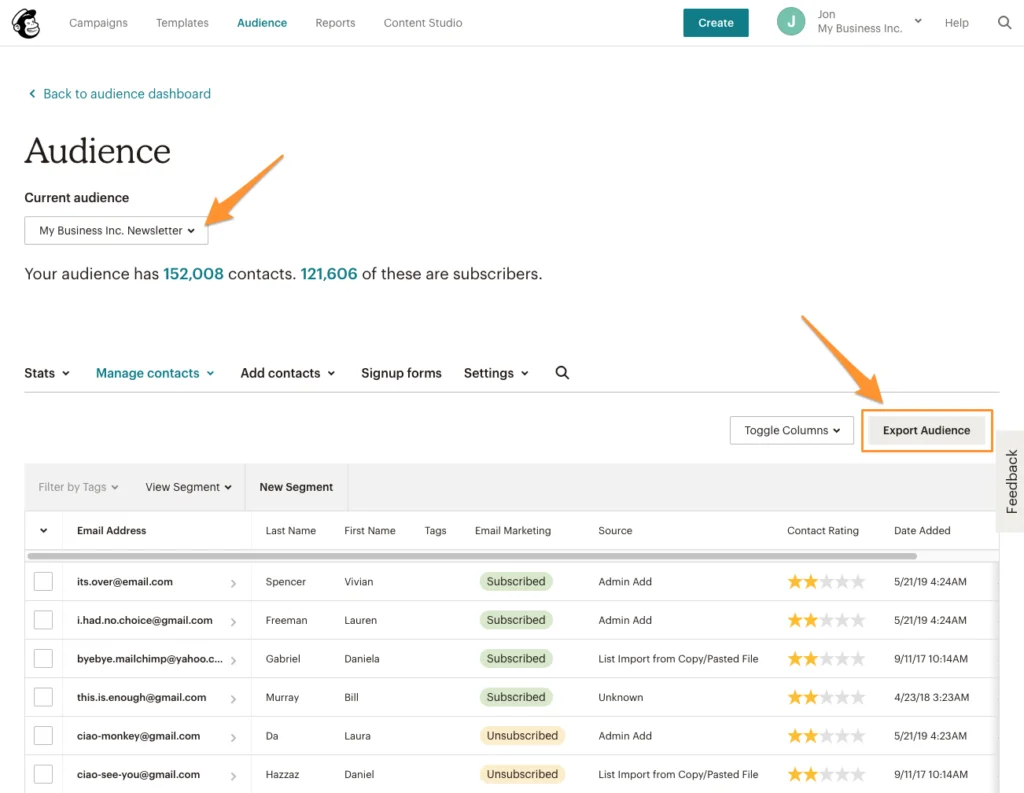
3. Click Export Audience. Repeat this process for every audience you need to export.
4. Download the CSV file and unzip it.

5. It’s now time to import your contacts into Sinch Mailjet. Log in to your account to get started.
Important: If you have multiple audiences (contact lists) in Mailchimp, you should import each audience into a separate Mailjet contact list.
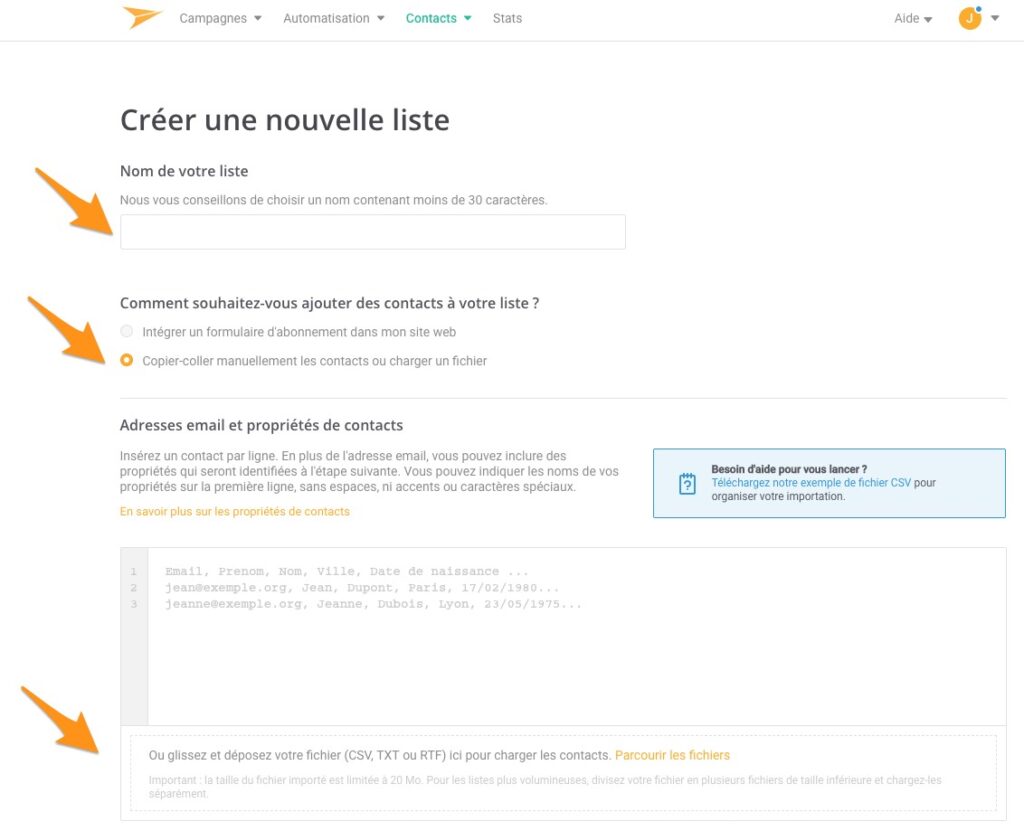
6. From the menu, go to Contacts > Contact Lists, then click Create a new list. Select Paste contacts manually or upload a file, then upload the CSV file containing your subscriber data.
7. If necessary, map the contact fields. All your contact properties (such as name, company, birthday, and more) will be imported. You can use these properties to segment your contact lists and personalize your emails. Once you’re done, click Save and continue.

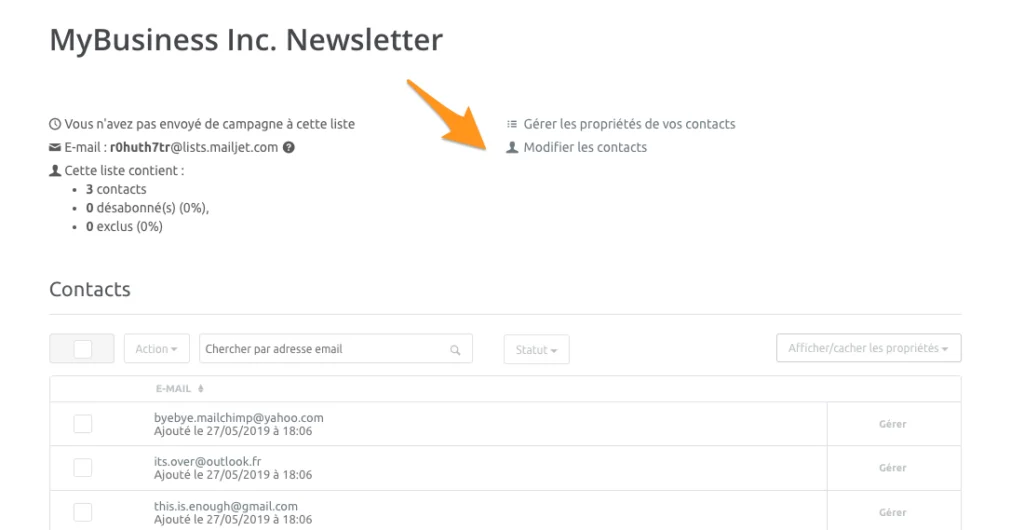
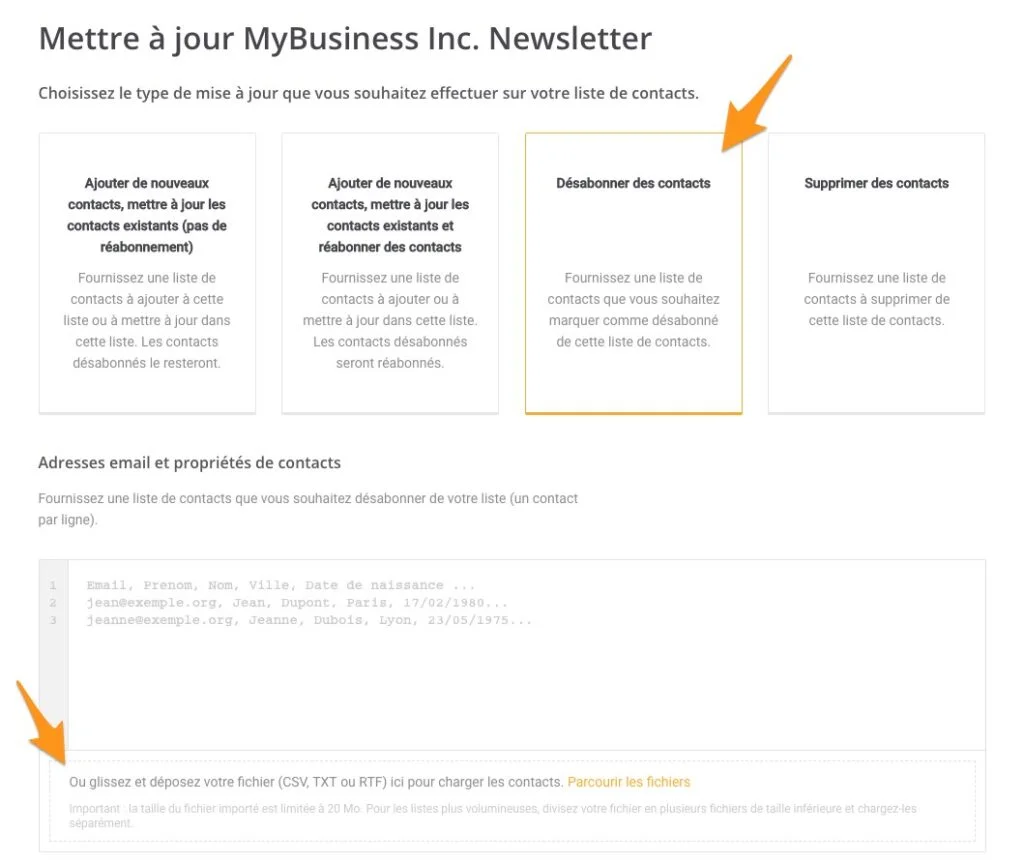
8. Next, import your unsubscribed contacts. This step is important to ensure you don’t send emails to contacts who have previously unsubscribed. Click Manage contacts.
9. Select Unsubscribe contacts as the update type, then drag and drop the CSV file containing your unsubscribed contacts. If necessary, map the fields before proceeding.
Step 2: Migrating your email templates
We won’t sugarcoat it: you can’t directly export your Mailchimp templates and continue editing them in Sinch Mailjet’s Email Editor. However, that doesn’t mean you have to start from scratch.
You have two options for working with your email templates in Sinch Mailjet:
- Option 1: Recreate your templates using our intuitive drag-and-drop Email Editor. It’s designed to help you build responsive email campaigns quickly and easily, without any coding skills.
- Option 2: Export your Mailchimp template as HTML and edit the HTML version in Sinch Mailjet.
If you choose the second option, follow these steps:
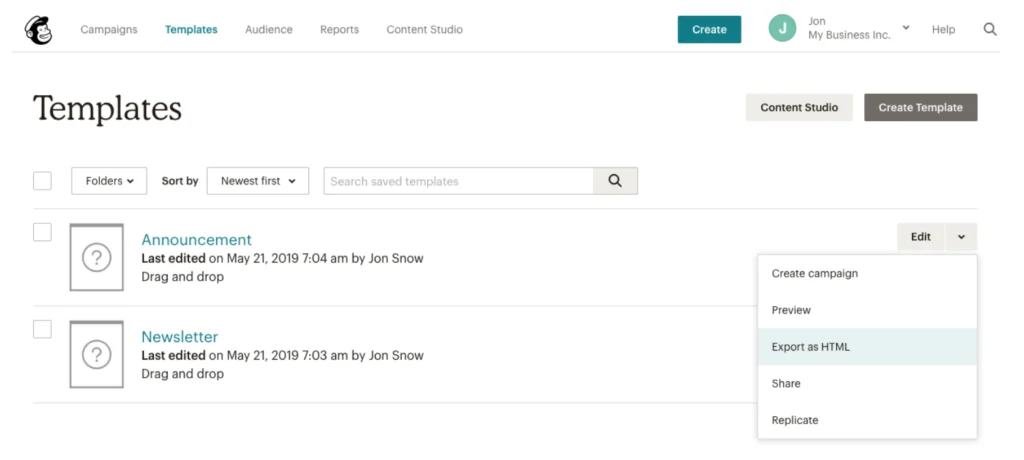
1. In your Mailchimp account, go to Templates, then click Export as HTML for each template you want to download.
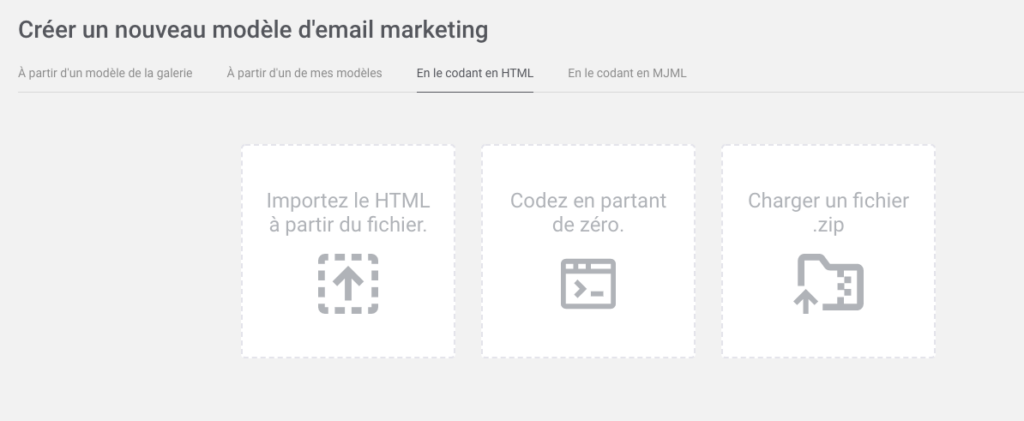
2. In your Sinch Mailjet account, go to Campaigns and select Create a new template. Then choose Code it in HTML and upload your HTML file.
Step 3: Export your reporting data
It isn’t possible to transfer your reporting data from Mailchimp to Sinch Mailjet. However, we understand how important it is to keep track of your email performance and historical results.
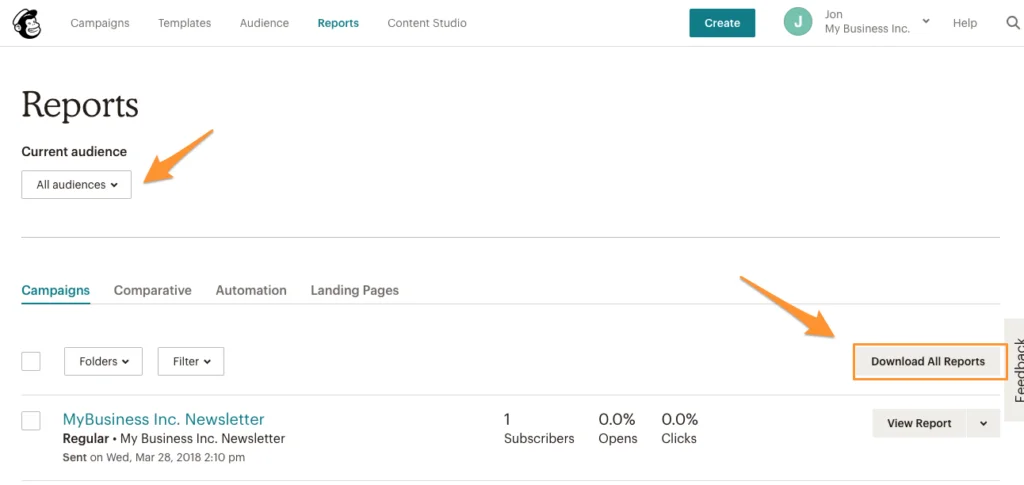
In your Mailchimp account, go to Reports, then select Download All Reports.
Your migration to Sinch Mailjet is complete!
Your contacts and templates are now ready to use in Sinch Mailjet.
Before sending your first campaigns, make sure to validate your domains and sender addresses, and configure your SPF, DKIM, and DMARC records to ensure optimal deliverability.
Ready to get the most out of Sinch Mailjet?
Discover how Sinch Mailjet can help you grow your audience with unlimited contacts, powerful collaboration features, advanced automation capabilities, and deliverability expertise.
👉 Create your free Sinch Mailjet account
👉 See how Sinch Mailjet compares to Mailchimp