Development
How to code and create an abandoned cart email
Do you ever think about the one that got away? Picture it: You hooked them with an engaging email campaign. Then they clicked through to your online store. They even added items to their cart. And then? They left you in the dust without completing their purchase.
Studies suggest about 70% of shoppers don’t follow through with their purchases, which means abandoned carts are a common pain point for ecommerce stores. Despite this high cart abandonment rate, an effective abandoned cart reminder email can help you recover lost sales and boost customer conversion rates.
Ready to get started? Let’s go through why you should send a cart recovery email and some email design tips to consider. Then we’ll look at some example emails and why they work. Finally, we’ll walk through a coding tutorial using our in-house templating language and markup language, MJML.
Why should I send an abandoned cart email?
Customers abandon their carts for several common reasons. It can happen unintentionally when websites crash and time out. Sometimes they lose their shopping cart in all the layers of open tabs. Or, sometimes, customers just need more time to think. That’s why an abandoned cart email can be a successful way to re-engage customers and guide them through the checkout process.
Do cart recovery emails actually work? Yes, they do: about 34% of abandoned cart emails are opened, and more than a third of them trigger clicks to redirect customers to the website. Besides increasing conversion rates with a call-to-action (CTA), abandoned cart emails also help you:
- Save time and money: Use automation to set up an email workflow for abandoned carts so you can focus your email marketing efforts elsewhere. These emails help you retain existing customers, allowing you to focus on bringing new shoppers to your ecommerce brand.
- Build better customer relationships: You can tailor abandoned cart emails to each customer’s browsing history, creating a sense of personalized attention and showing your customer that you value their needs.
- Improve your users’ experience: Following up is critical! Include a feedback option in your abandoned cart email to collect information on why your users abandoned their carts in the first place. Use this data to decrease shopping cart abandonment and optimize your shopping experience.
What are 5 things to consider before sending a cart recovery email?
Of course, every abandoned cart email needs some basics to draw your customer back to your shop, like compelling copy, a personalized list of their abandoned items, and a clear path back to their cart. We’ll go over these in the tutorial below. But before we dive into coding, let’s go over some nice-to-haves to consider while designing your abandoned cart email template:
- Consider email timing: There’s an optimal time to contact your customers after they ditch their carts. Contacting them too soon results in lower conversion rates, but waiting too long can result in even lower rates. The best time to send a cart reminder email is one hour after your customer abandons their cart. If your email strategy allows for it, try to set up an automated follow-up email sequence. Send the first email one hour after abandonment, the second one day after abandonment, and the third reminder three days after abandonment.
- Offer a discount: Many customers abandon their carts because the order value is higher than expected due to shipping costs or taxes. There’s an easy fix for this: offer a discount. Use coupon codes to bring the overall price, including shipping and tax, back down to what your customer is willing to pay.
- Include social proof: Don’t dismiss the power of a good review! Include snippets of testimonials or other social proof in your abandoned cart emails to encourage your customers to make a purchase.
- Reserve the items in the abandoned cart: For customers, there’s nothing more frustrating than clicking through to complete a purchase only to find out the item has sold out. Offer to reserve your customer’s items in their abandoned cart for a certain amount of time if you have sufficient stock. You can also use this to take advantage of the scarcity effect to create a sense of urgency for completing a purchase.
- Write a compelling subject line: Email subject lines that mention discounts or include emojis usually experience lower open rates. Instead, keep your subject line personalized but straightforward. Lastly, create urgency, but use it sparingly.
Not sure what the best strategy is? Test out your abandoned cart emails before sending them with our A/B testing tool.
What are some abandoned cart email examples that work?
Let’s see some of these strategies in practice. Below, we’ll go through 10 recovery emails from online retailers and discuss why they work.
1. The “pickup line” approach
Madewell nails it with their two-part headline. The second part of the headline – “…but they would look even better on you” – is the classic aspirational copy. The pickup line approach playfully personalizes the email to engage your customer. Just like copy is a crucial component of your marketing campaigns, it can make or break your abandoned cart reminders.
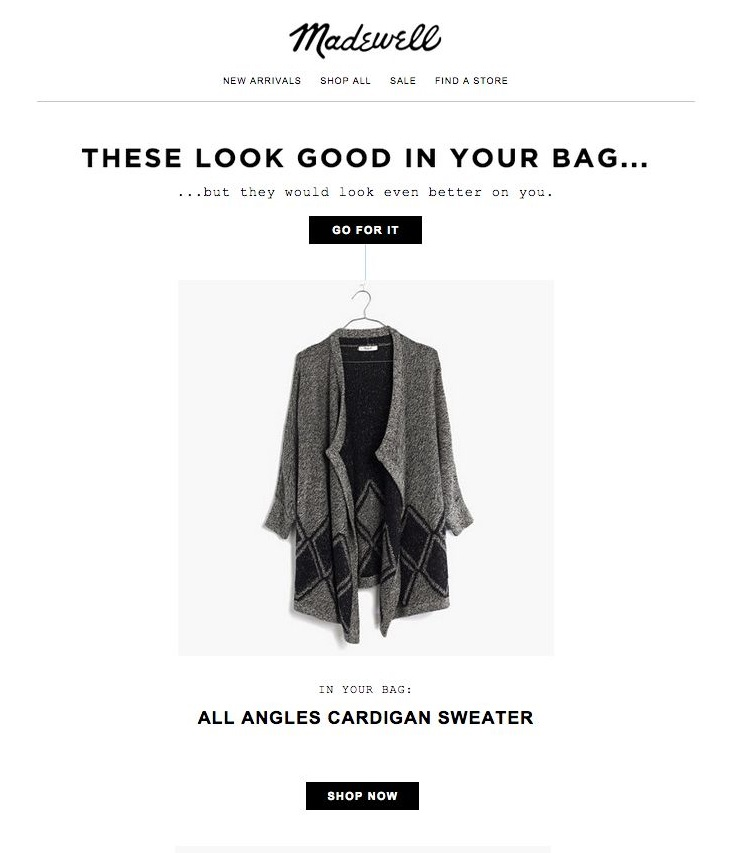
Takeaway: Keep it light but personal to encourage your customer to go back to their carts.
2. The straight-shooter
23andMe keep it short and simple with their headline, “Don’t forget to order your kit.” Paired with their simple CTA button, “Order today,” 23andMe gives a clear direction to customers without wasting their time.
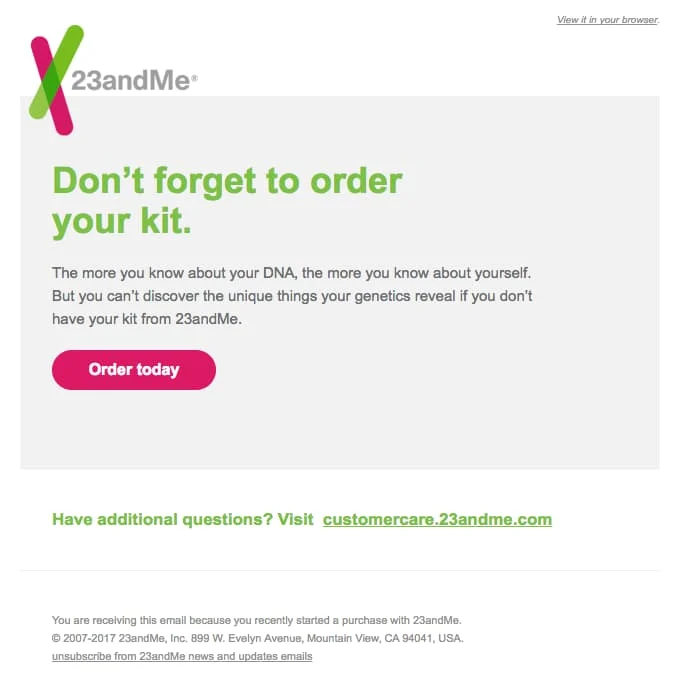
Takeaway: Convey a sense of urgency without overwhelming your customer by providing clear steps to follow through.
3. The cheeky reminder
Sometimes, customers genuinely forget about their cart as they juggle multiple windows in their browser. Pacsun embraces this with a cheeky reminder to bring the customer back to their shop.
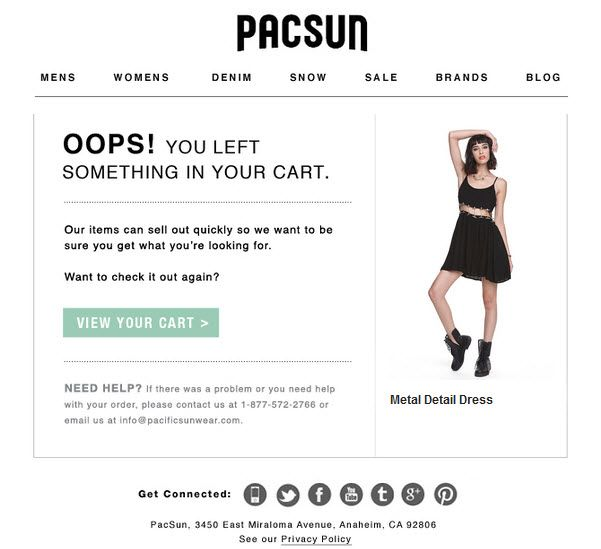
Takeaway: Sometimes, a gentle reminder is all your customer needs to re-engage with your shop.
4. The text-only personalized email
You need graphics and interactive carts to make an abandoned cart email work, right? Not necessarily, as Ugmonk shows below. They focus on creating a personalized, tailored feel in their text-only email to re-engage their potential customer.
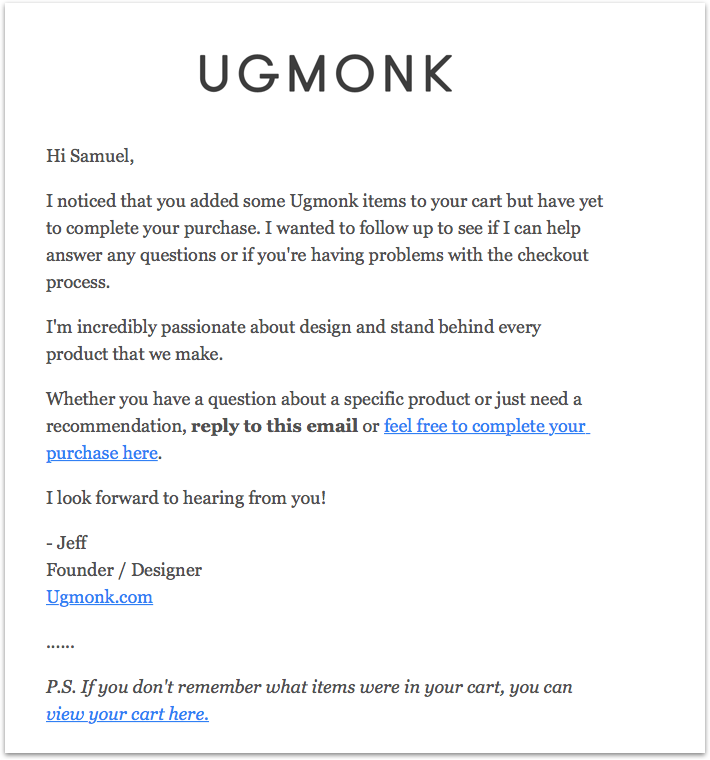
Takeaway: A personalized approach can be better than a loud email full of distracting CTAs and graphics. Try out the cart recovery email as a chance to start a conversation with your customer.
5. The scarcity play
When used sparingly, the scarcity effect can be a powerful play. Here, Google uses catchy copy to build a sense of urgency to lead their customers to follow through. It can be tempting to impress customers with pop-ups or other interactive follow-ups. However, these can be distracting. It’s best to keep your cart recovery email streamlined and focused.
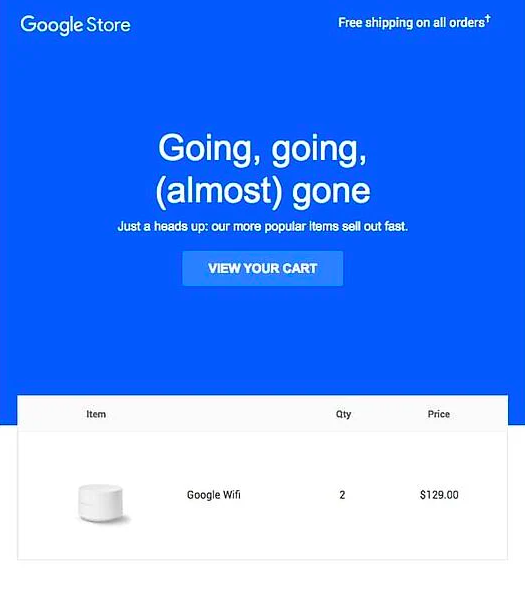
Takeaway: Play off the scarcity effect and use clean designs to funnel your customers’ attention to the CTA and boost click-throughs.
6. Add an incentive
Discounts are a great way to win back customers. Bonobos keep it simple and sweet to focus the customer’s attention on their abandoned items. Then, Bonobos brings it home with a sweet 20% discount code.
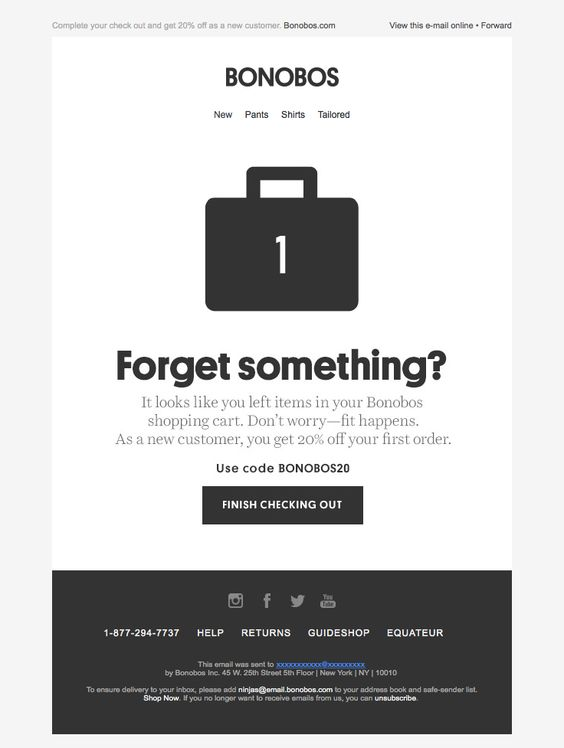
Takeaway: Use discounts in addition to creative email copy and visuals to create effective emails for abandoned cart recovery.
7. Use a question
What’s the best way to make it personal? Ask a question. Nordstrom uses a conversational tone to connect with their customer in the email below.
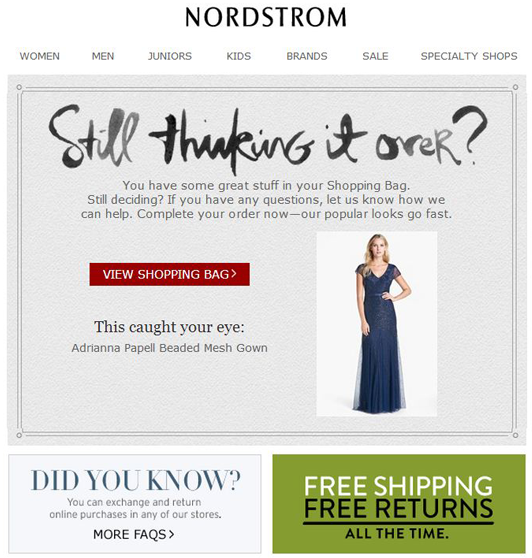
Takeaway: Remember to keep it personal! This engages your customers and builds a lasting relationship.
8. Add personality
Appeal to your customers by adding a bit of personality to the items they’ve abandoned. ThredUp does this well by including the abandoned item with a text bubble reading, “I’m having abandonment issues” and a CTA which reads, “It’s meant to be.”
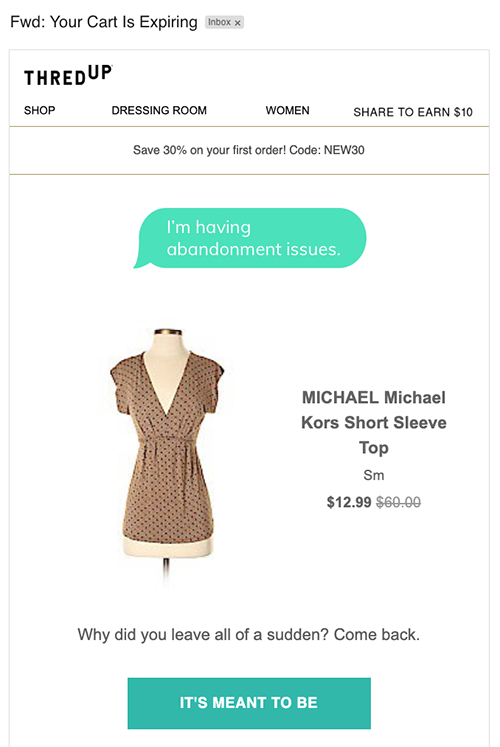
Takeaway: Seal the deal with cheeky copy that adds personality to the items left behind.
9. The clock is ticking
Drop reminds its customers that they have a limited time to scoop up items they’ve abandoned in their carts. The sense of urgency might help in generating click-throughs.
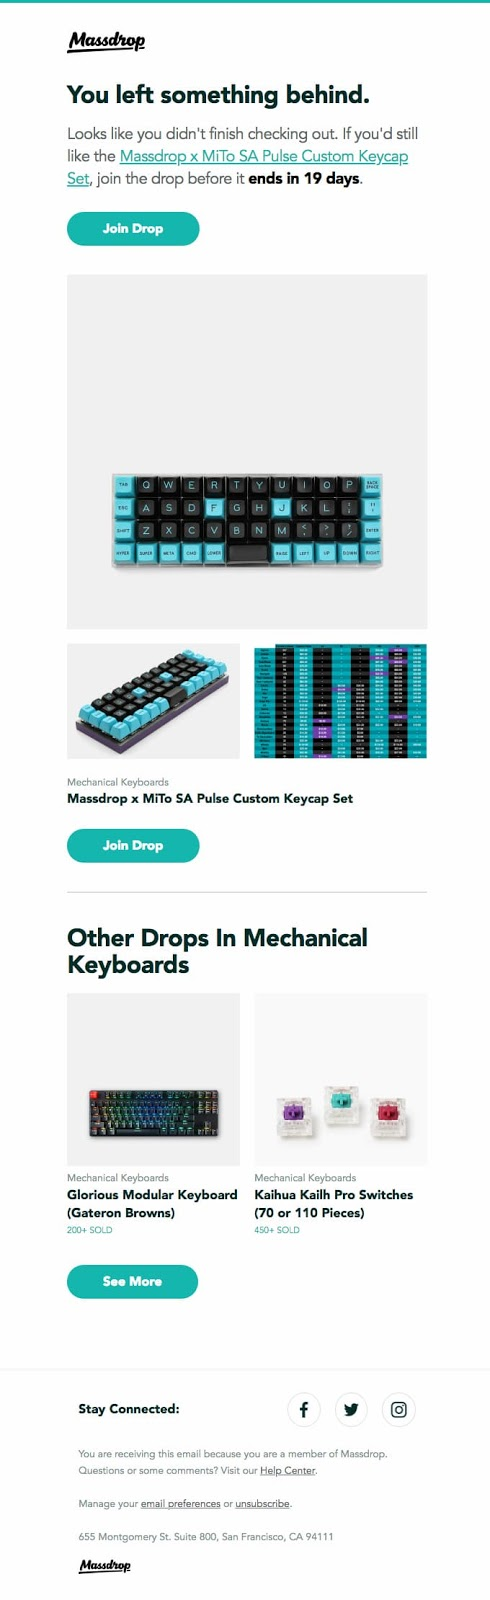
Takeaway: Engage customers by appealing to their sense of urgency in getting a good deal before it’s over.
Social proof in the forms of reviews, user photos, and other testimonies can turn the tide in re-engaging your customer. Social proof show that other customers have tried out and benefited from the items they’re abandoning.

Takeaway: Use social proof to reassure your customers about your product’s quality and convince them that they need what you’re selling.
How do I code an abandoned cart email?
Now that we’ve seen some examples of the best abandoned cart emails, let’s dive into creating your own abandoned cart email.
We’ll focus on building these key components of an abandoned cart email:
- Defining the items left in the cart
- An incentive, like a discount or a special deal, that is personalized for your user
- A snazzy headline to engage your customer
- A clear CTA to lead them back to your shop
We’ll go through some prerequisites and then walk through coding each of the sections in an abandoned cart email template with the following steps:
- We’ll start by creating a header for our template. This section contains menu links, just like our webshop.
- Then, we’ll create a template for the main body of our email. This will be composed of two sections. The first will contain a hero section to showcase our attention-grabbing copy.
- We’ll then use the second section of our main body to display our customer’s cart, the cost, and a CTA. We’ll start by defining a loop to display the items in our customer’s cart to add a touch of personalization.
- Since price is a leading factor in cart abandonment, we’ll include a cost section reflecting any discount codes to entice a customer back to the shop.
- Lastly, we’ll create a section for our CTA.
This is what we’ll be creating:
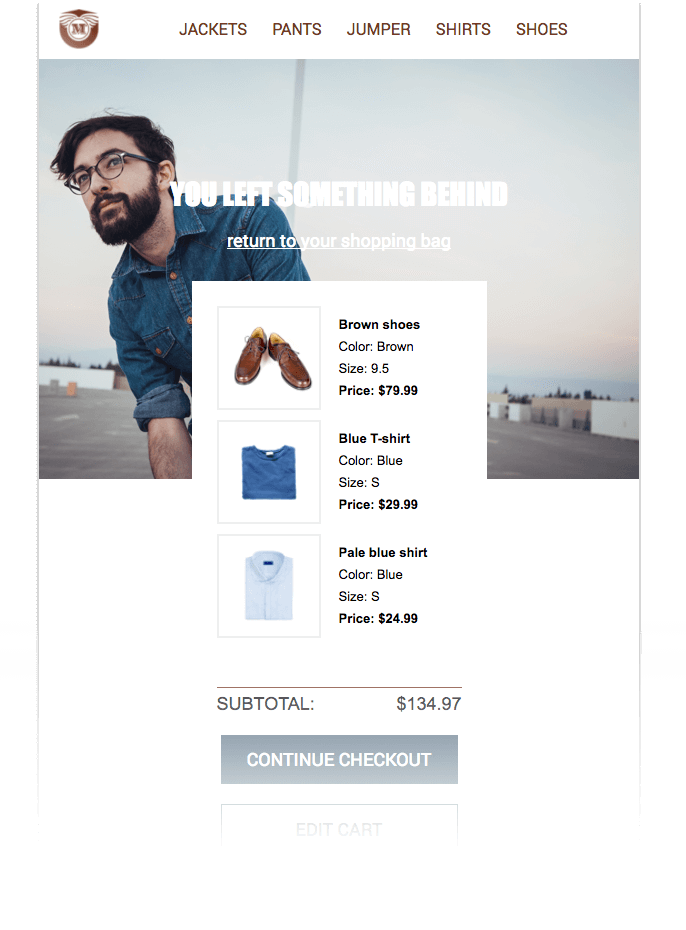
It’s important to encourage your clients to resume their shopping experience with as little friction as possible. That means you’ll want to build an email template that displays your customers’ shopping cart just as they left it on your website, both in terms of design and the items left behind. Creating a design that’s close to your customers’ cart is key.
Before you start
Before starting, note that you’ll need a Mailjet account for this tutorial. Below, we’ll use our in-house templating language and MJML, Mailjet’s open-source markup language to create responsive emails. Some basic knowledge about MJML is a plus, but it isn’t necessary. However, you’ll need a working knowledge of JSON files and CSS, for loops, arrays, and variables.
If this sounds too code-heavy for you, check out our Email Editor to build responsive email templates using a drag-and-drop feature.
1. How do I code a header for my email template?
Let’s start by creating a header for our email template. This section contains the company logo and a navigation bar with links that lead to different pages on our webshop, as shown below.

We’ll create this header with the following:
- Use as a container. is an easy way to incorporate a responsive navigation bar at the top of your email. This will display as a “hamburger” menu on mobile devices. We will use as the container for our menu. This meets our needs since this container consists of two .
- Use the first to contain a that displays the logo.
- Use the second to host the component, which will create links based on a list of children.
- Add some inline CSS to style our template.
Check out our code below:
u003cmj-attributesu003ern u003cmj-class name=u0022nav-linku0022 color=u0022#763b26u0022 font-size=u002220pxu0022 font-family=u0022Roboto, Helvetica, Arial, sans-serifu0022 /u003ernu003c/mj-attributesu003ernrn[...]rnrnu003c!u002du002d Navigation baru002du002du003ern u003cmj-section background-color=u0022#ef6451u0022u003ernrn u003cmj-column padding=u00220pxu0022 width=u0022100pxu0022u003ern u003cmj-image src=u0022https://placeholder.com/wp-content/uploads/2018/10/placeholder-1.webpu0022 width=u002250pxu0022u003eu003c/mj-imageu003ern u003c/mj-columnu003ernrn u003cmj-column padding=u00220pxu0022 width=u0022400pxu0022u003ern u003cmj-navbar padding=u00220pxu0022 base-url=u0022https://mjml.iou0022 hamburger=u0022hamburgeru0022 ico-color=u0022#ffffffu0022u003ern u003cmj-navbar-link padding=u00225pxu0022 href=u0022/gettings-started-onboardu0022 color=u0022#ffffffu0022u003eGetting startedu003c/mj-navbar-linku003ern u003cmj-navbar-link padding=u00225pxu0022 href=u0022/try-it-liveu0022 color=u0022#ffffffu0022u003eTry it liveu003c/mj-navbar-linku003ern u003cmj-navbar-link padding=u00225pxu0022 href=u0022/templatesu0022 color=u0022#ffffffu0022u003eTemplatesu003c/mj-navbar-linku003ern u003cmj-navbar-link padding=u00225pxu0022 href=u0022/componentsu0022 color=u0022#ffffffu0022u003eComponentsu003c/mj-navbar-linku003ern u003c/mj-navbaru003ern u003c/mj-columnu003ernrn u003c/mj-sectionu003e
Try it out with our live MJML editor.
2. How do I code the hero section of my email template?
The main body of our email template consists of two sections. The first is our hero section and the second contains our customer’s cart.
First, let’s set up the main body and create the hero section located below the header. In our example, this section contains the headline, “You’ve left something behind,” as shown below.

You can also use this space to include a hyperlink back to your customer’s cart, as we’ve done above. We’ll do this with the following steps:
- Use two nested .
- Fill in the background-url attribute to use our image as a background image.
- Then, in our first , we use two to display our catchy sentences.
Here’s our code:
u003c!u002du002d Hero + Cart u002du002du003ernu003cmj-sectionrn padding-top=u0022100pxu0022rn background-url=u0022https://s23.postimg.org/vwq5ctlln/hero.pngu0022rn background-size=u0022100%u0022rn background-repeat=u0022no-repeatu0022rn background-color=u0022#ffffffu0022u003ern u003c!u002du002d Hero texts u002du002du003ern u003cmj-section vertical-align=u0022middleu0022u003ern u003cmj-columnu003ern u003cmj-textrn padding=u002220pxu0022rn color=u0022#ffffffu0022rn font-family=u0022Impact, Tahoma, Helvetica, Arial, sans-serifu0022rn align=u0022centeru0022rn font-size=u002230pxu0022rn line-height=u002230pxu0022u003ern YOU LEFT SOMETHING BEHINDrn u003c/mj-textu003ern u003cmj-textrn padding-bottom=u002230pxu0022rn align=u0022centeru0022rn font-size=u002218pxu0022u003ern u003ca href=u0022#u0022 style=u0022color:#ffffffu0022u003ereturn to your shopping bagu003c/au003ern u003c/mj-textu003ern u003c/mj-columnu003ern u003c/mj-sectionu003ern u003c!u002du002d Cart u002du002du003ern u003cmj-section background-color=u0022transparentu0022u003ern ...
Try it out with our live MJML editor.
3. How do I code an abandoned cart with personalized items?
Let’s focus now on building the second section of our template’s main body. Here’s our example:
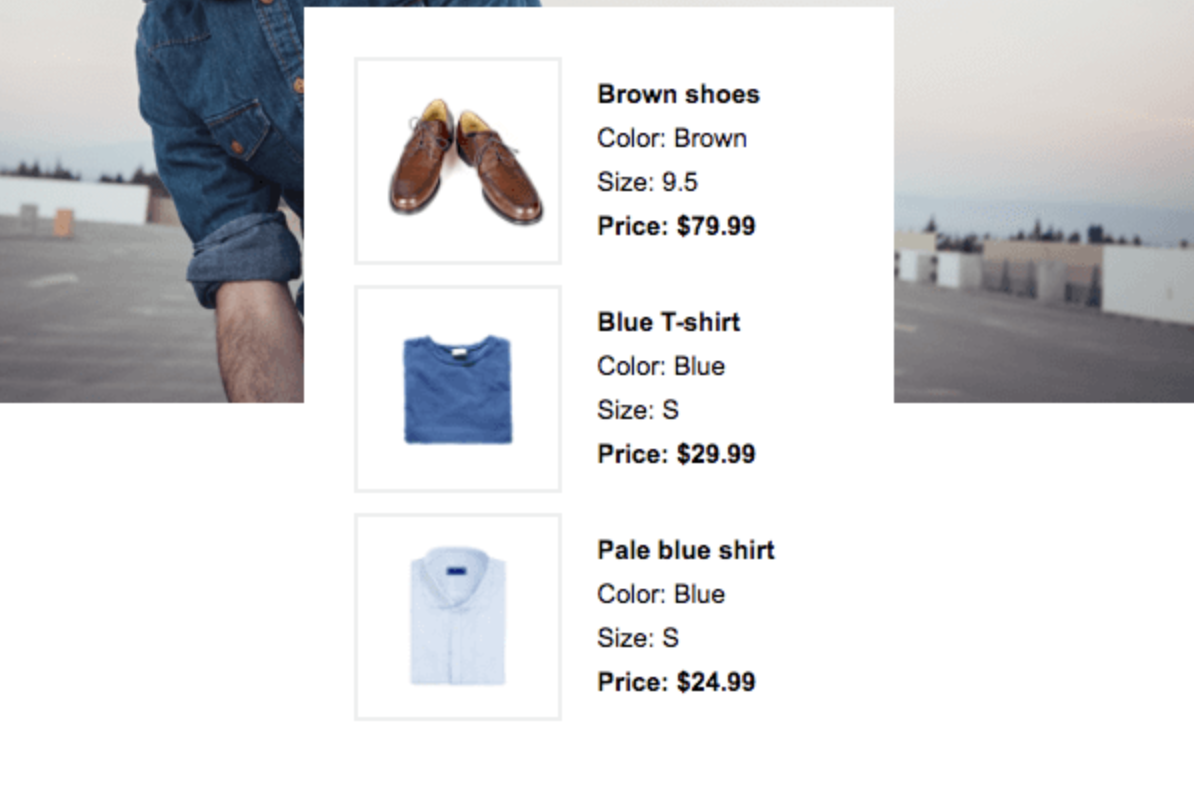
The cart is a list of items whose data is in the variables.json file:
{rnu0022itemsu0022: [rn {rn u0022titleu0022: u0022Brown shoesu0022,rn u0022image_URLu0022: u0022https://s13.postimg.org/r3otqmynn/shoes.pngu0022,rn u0022priceu0022: {rn u0022currencyu0022: u0022$u0022,rn u0022separatoru0022: u0022.u0022,rn u0022amountu0022: 79.99rn },rn u0022sizeu0022: u00229.5u0022,rn u0022coloru0022: u0022Brownu0022rn },rn {rn u0022titleu0022: u0022Blue T-shirtu0022,rn u0022image_URLu0022: u0022https://s13.postimg.org/onn0csgkz/t_shirt.pngu0022,rn u0022priceu0022: {rn u0022currencyu0022: u0022$u0022,rn u0022separatoru0022: u0022.u0022,rn u0022amountu0022: 29.99rn },rn u0022sizeu0022: u0022Su0022,rn u0022coloru0022: u0022Blueu0022rn },rn {rn u0022titleu0022: u0022Pale blue shirtu0022,rn u0022image_URLu0022: u0022https://s13.postimg.org/shgglxxwz/shirt.pngu0022,rn u0022priceu0022: {rn u0022currencyu0022: u0022$u0022,rn u0022amountu0022: 24.99rn },rn u0022sizeu0022: u0022Su0022,rn u0022coloru0022: u0022Blueu0022rn }]rn}
We’ll personalize our cart by setting up a for loop {% for single_element in array_variable %}, using the following pattern: {{ var:property_key:default_value }}. Within the loop, a new variable single_element is created and updated for each iteration, ready to be referenced in our code:
u003c!u002du002d Cart u002du002du003ernu003cmj-section background-color=u0022transparentu0022u003ern u003c!u002du002d Image u002du002du003ern u003cmj-column vertical-align=u0022middleu0022 width=u0022295pxu0022 background-color=u0022#ffffffu0022 border=u00221px solid transparentu0022u003ern u003c!u002du002d Item lists u002du002du003ern u003cmj-table padding=u002224pxu0022u003ern {% for item in var:order.items %}rn u003ctru003ern u003ctd width=u0022120pxu0022 style=u0022padding-bottom:10pxu0022u003ern u003cimgrn align=u0022leftu0022rn mj-class=u0022img-borderedu0022rn src=u0022{{ item.image_URL }}u0022rn width=u0022100pxu0022rn style=u0022border: 2px solid #eeeeeeu0022rn /u003ern u003c/tdu003ern u003ctd width=u0022120pxu0022 style=u0022padding-bottom:10pxu0022u003ern u003cstrongu003e{{ item.title }}u003c/strongu003eu003cbr /u003ern Color: {{ item.color }}u003cbr /u003ern Size: {{ item.size }}u003cbr /u003ern u003cstrongu003ePrice: {{ item.price.currency }}{{ item.price.amount }}u003c/strongu003ern u003c/tdu003ern u003c/tru003ern {% endfor %}rn u003c/mj-tableu003ern ...
Try it out with our live MJML editor.
4. How do I add the subtotal to my abandoned cart email?
We’re almost done! Now we need to let our customers know their order value and any discounts we might offer. This is what we’ll create:
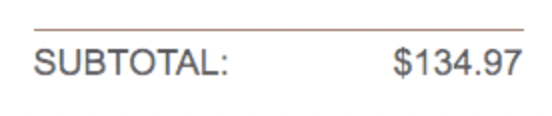
We’ll use a
u003c!u002du002d Subtotal u002du002du003ernu003cmj-table font-size=u002218pxu0022 padding=u00225px 24px 10px 24pxu0022u003ern u003ctru003eu003ctdu003eSUBTOTAL:u003c/tdu003eu003ctd style=u0022text-align: rightu0022u003e{{ var:order.subtotal.currency }}{{ var:order.subtotal.amount }}u003c/tdu003eu003c/tru003ernu003c/mj-tableu003e
Try it out with our live MJML editor.
Remember, you can use conditional blocks to add discounts that only show up under certain conditions.
5. How do I code a CTA in my email template?
Lastly, we want to add a CTA to drive click-throughs back to your web shop. This is what we’re trying to create:
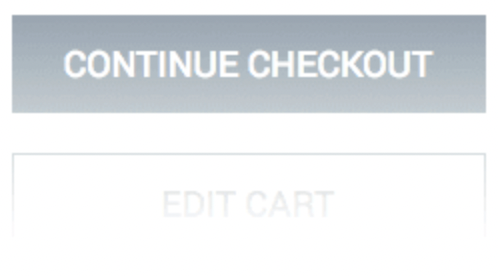
We’ll create a button for our CTA with the
u003c!u002du002d CTAs u002du002du003ernu003cmj-button href=u0022checkoutu0022 background-color=u0022#2c4961u0022 padding=u002210pxu0022u003ern continue checkoutrnu003c/mj-buttonu003ernu003cmj-button href=u0022editu0022 background-color=u0022#ffffffu0022 border=u00221px solid #2c4961u0022 color=u0022#2c4961u0022 padding=u002210px 0px 30px 0pxu0022u003ern edit cartrnu003c/mj-buttonu003e
Try it out with our live MJML editor.
Wrapping up
And that’s it! We’ve successfully created an abandoned cart email template. Check out our GitHub tutorial for more details to get started in creating your own cart recovery email.
At Mailjet, we know the value of a fully integrated templating language, which is why we created our templating language with our transactional send API in mind. We’re here to help you manage everything in one template, to save you time and effort.
So, let’s recap: use MJML templating language for producing responsive HTML emails without effort and bring them to life with conditional blocks and variables. This combo can change your life as a developer. That’s why we’ve decided to show you how to create and send awesome transactional emails with our how to code email tutorials: